The Custom Report Management screen allows to create, modify and delete custom cumulative reports. Custom reports appear in the drop-down list on the Cumulative Report screen.
To Create a Custom Report
To create a custom report:
Click the Create New Custom Report button. The Custom Report Details screen displays.
Enter a name for the custom report. This field accepts spaces, underscores, dashes and alphanumeric characters. (For instance: abc test#2, metabolic_panel and Rpt1are all examples of valid report names).
The Facility field defaults to the currently active facility. To select another facility use the Change Facility menu option and then return to the screen.
On the Lab field you have the option of accepting the default or selecting a different lab.
Select how the tests should be sorted: Alphabetically (default) or Grouped by Test.
Select a Date Range or accept the default (All Results).
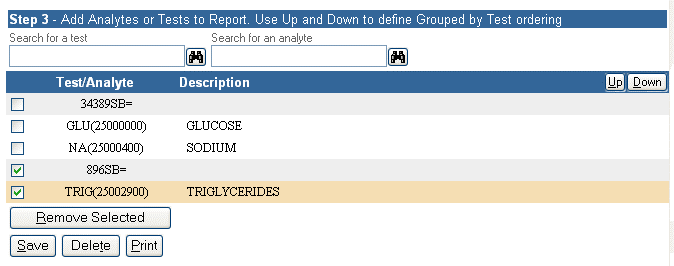
On Step 3 use the search fields to search for analytes or tests.
If applicable, use the Up and Down buttons to re-arrange "Grouped by Test" sorting.
Click Save to save the custom report. The new report appears listed in the Custom Report drop-down list on the Cumulative Report screen.
To Modify a Custom Report
On the Custom Report Management screen click the hyperlinked report you wish to modify. The Custom Report Details screen displays.

Add additional items by searching and selecting new analytes or tests.
You may also remove selected analytes or tests by checking the items and clicking the Remove Selected button.
Click Save to save any changes made.
To Delete a Custom Report
On the Custom Report Management screen select the reports you wish to delete.
Click Remove Selected. A confirmation message displays.
Click OK to delete the test(s) or click Cancel to keep the test(s).
| [ Previous Topic] [Next Topic] [Print Topic] | [ Top] [Back] |